A. Step-by-step using masking fluid
B. Some artists approaches to this subject
C. Photographs showing the delicate and the intense side of colour in this subject.
D. Some high quality photos for you if you struggle to find a photo for your project.
A. Step by Step Guide (Masking fluid method)
[Taken from An Introduction To Watercolour by Ray Smith, published by DK books.]
The finished painting in this guide:
Now the steps:
1. Draw in your picture, outline only, no shading, using a soft pencil (2B or 4B). With a round brush (No.4 or No.6) mask out the areas you want to protect. In the first stage this will be all the white "snow" areas and the sky. Protect your brush by dipping in washing up liquid or soap BEFORE dipping your brush in the masking fluid. Always wash your brush as soon as possible afterwards, again in soapy water which is warm but not hot.
2. Allow the masking fluid to dry on the paper, about 10-15 minutes or use a hair drier to speed it up (2-3 minutes). Use a medium sized round brush (No. 6 or No. 8) to apply a wash of COBALT blue mixed with BURNT SIENNA over the areas that have no masking fluid. If you don't have these colours use what you have - a dark blue and a brown, or try ULTRAMARINE and BURNT UMBER.
3. Add more washes of the BURNT SIENNA (or whichever brown you have) and add PAYNE'S GREY to darken the tones on the fence and the trees. To build up the depth of the tones, allow each layer (referred to as a GLAZE or a WASH) to dry before you add another layer. Next mask out the areas of the water where the tree reflections are (remembering the soap tip). If you do not have PAYNE'S GREY try mixing a blue with a brown to get a warm grey).
4. When the masking fluid is dry, deepen the tones in the river with further layers of COBALT blue mixed with BURNT SIENNA. Remember, if you don't have these colours use what you have - a dark blue and a brown, or try ULTRAMARINE and BURNT UMBER.
5. Remove the FULLY DRY masking fluid using a soft rubber or your finger tips. As long as the painting has properly dried you should find the masking fluid comes off without damaging the paper. Then paint in the sky area using a mixed wash of ALIZARIN CRIMSON, COBALT BLUE AND BURNT SIENNA. If you don't have these colours use whichever CRIMSON, BLUE and BROWN you have in your toolbox. Add layers of these colours, ensuring each layer is dry before you add the next one, to get the depth of tone you want in the painting. Add some shadows in the snow areas using either PAYNE'S GRey or a mixed grey (a brown and a dark blue). See the finished painting from this guide at the top of this page.
REMEMBER this is just a guide, you can use these steps and these colours, if you wish, in the picture you have chosen for your WINTER SCENE/SNOW project.
Other Resources:
B. Some artists approaches to the subject:
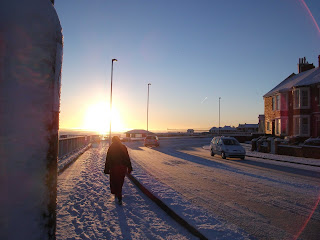
C. Some photographs showing the delicate and at times intense colours that you find in snow:
D. Some high quality photos of scenes in case you cannot find one of your own (taken by the tutor):


No comments:
Post a Comment